A PRIMER ON KNIFE
SHARPENING
Chapter 1
by Steve
Bottorff
color
photographs by Carol Butz
CONTENTS
Introduction
Testing Sharpness
EQUIPMENT
Recommended
Books on Knife Sharpening
 Sharpening
School Video
Sharpening
School Video
INTRODUCTION
 I really admired my
grandfather, who was a doctor, pharmacist, hunter and gardener. I
especially admired two of his nonprofessional skills - even when he was in
his nineties he could put a razor edge on a knife, then use that knife to
put a perfect point on a pencil.
I really admired my
grandfather, who was a doctor, pharmacist, hunter and gardener. I
especially admired two of his nonprofessional skills - even when he was in
his nineties he could put a razor edge on a knife, then use that knife to
put a perfect point on a pencil.
I learned to sharpen with hand stones
at Grandpa's knee, but I always had trouble with certain knives. For years
I searched for the ultimate knife sharpening method. I realized that I
might not have the skills required so I was willing to use whatever
gadgets and machines I could find. Testing over 30 different knife
sharpeners taught me what works and what doesn't, and I decided to write
this article and share the information. BTW: I gave up on sharpening
a pencil with a knife and bought a pencil sharpener.
The instructions that come with
sharpening equipment is often inadequate. Some give no instruction at all.
I note in this article when equipment comes with good instructions.
There are two schools of knife
sharpening - those who like a knife to keep some roughness from the stone
and those who believe that it should be as smooth as possible. Both
approaches have their benefits.
Blades with a rough edge can be
aggressive cutters, especially when the blade is thin. They
have micro-serrations that act like a microscopic saw. These
micro-saws are very well suited for slicing fibrous material, such as a
rope. This edge is easy to produce because you just stop sharpening after
a medium stone (200 to 300 grit). Blades sharpened this way do become dull
faster as the points wear or bend, so frequent touch-ups are needed.
Smooth edges are best for cutting
with a straight push and are preferred by barbers, surgeons and
woodworkers. Research done by John Juranitch of Razor Edge Systems (1)
shows that butchers can cut more meat per shift and tire less when using a
smooth edge. Analysis with an electron microscope (2) has confirmed that
wood cutting ability is correlated to edge smoothness. Sharpening a smooth
edge requires more work, but the results are worth it.
TESTING
SHARPNESS
To be sure you are improving your
sharpening; you need an objective way to test the results. Tests
evaluating sharpness range from cutting silk to chopping trees. What you
need is a test method that are useful in your workshop as you are
sharpening. A major knife maker tests sharpness on nylon
paint brushes.
Most people test an edge by rubbing their thumb lightly across the edge
and feeling how the edge grabs as it tries to cut into the thumb pad. To
keep your thumb calibrated, test a known sharp edge like a new razor blade
periodically.
Shaving hair on your hand or arm is
another common sharpness test. Shaving sharpness can be achieved even on
heavy hunting knives or an axe. I own a hunting knife that will shave even
though the edge angle is a rather blunt 30 degrees. I use the term shaving
sharp to describe this degree of sharpness and razor sharp to describe
even greater sharpness. Razor sharpness is comparable to a
razor blade and will literally pop the hairs off your hand or arm. Razor
sharpness is only possible with both a polished edge and a small edge
angle.
Testing by shaving can be misleading
if the blade has a burr or wire edge. Steel naturally forms a burr - a
thin bendable projection on the edge - during the sharpening process. A
blade with a burr will shave but will not stand up to hard use. To test
for a burr, slide your fingertips lightly from the side of the blade over
the edge. You will feel the burr drag against your fingers. Test from both
sides, because burrs are usually bent over one way or the other. As your
sharpening improves you will be looking for smaller and smaller burrs.
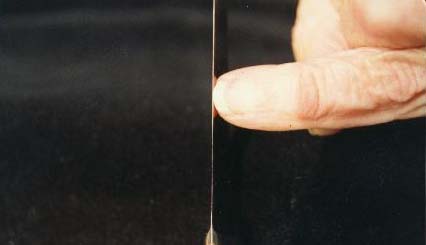
The glint along this edge means a dull blade.
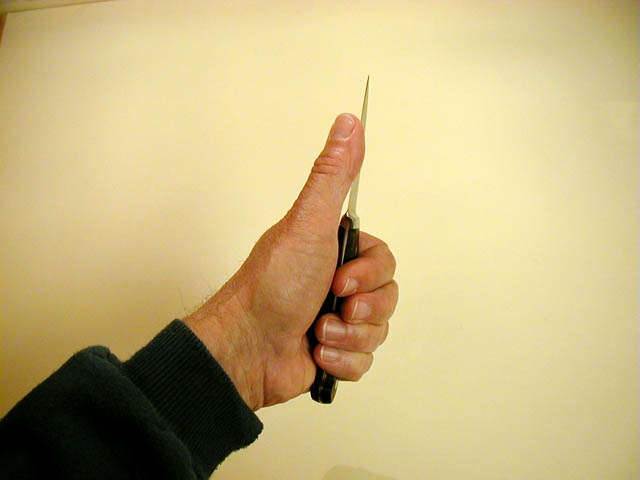
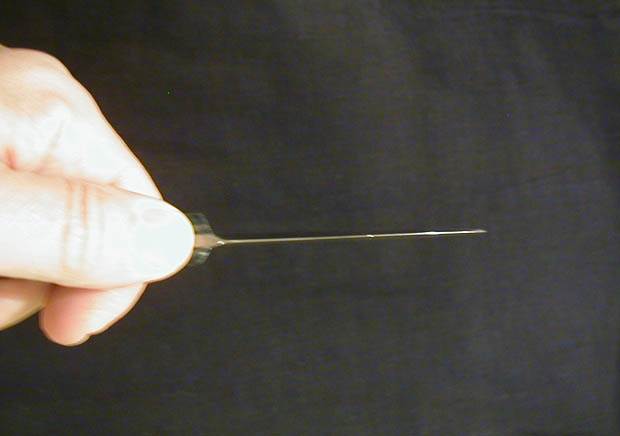
Many good sharpeners, including my
grandfather, have learned to see a dull edge. Hold the blade in front of
you with the edge in line with a bright light. Move the blade around a
bit. A dull edge will reflect a glint. Nicks and burrs will also cause
glints. When the blade is sharp these glints will be gone.
I had a eureka moment a few days ago.
I was standing in my kitchen and say a single strand of a spiderweb in our
back yard, about 30 ft away. Now I know that a spider web of about a ten
thousandths of an inch, so at 30 ft it is well beyond the resolution of
the human eye, let alone through a screen door. But as a light source
reflecting the sun it is perfectly visible. (It is the same with stars,
they are too small to see them but we can see the light.)
Then it occurred to me that this is
how I see the old dull edge of knives and scissors even without
magnification. A bright light is the secret, coupled with rolling the edge
so you see every possible angle between your bevels. Any glint of light as
you roll and you have found the dull spot. Eureka!
Another test for sharpness is to
press the edge lightly on your thumbnail at about a 30-degree angle. If it
cuts into your nail it is sharp. If it slips it is dull. The sharper the
blade, the smaller you can make the angle before it slips. Try this with a
new razor blade to see how a really sharp blade feels. The down side of
thumbnail testing is that the little cuts in your nail get dirty and look
bad until the nail grows out. For this reason some people do this
test using a plastic pen or pencil.
THE
EQUIPMENT
SHARPENING
STONES
No shop is complete without at least
one bench stone, preferably two or more of different grits. I recommend
you buy the largest sharpening stones you can afford. Stones for shop use
should be as long as the longest knife you plan to sharpen. Remember that
Momma probably owns the really big knives around the house, and you will
be expected to sharpen her 8 or 10 inch butcher knives. Smaller stones are
handy for field use. Large tool suppliers such as MSC or
McMaster-Carr and restaurant suppliers are good sources for sharpening
stones.
Natural sharpening stones include
both stones found in nature and reconstructed stones. The original Washita
and Arkansas stones were quarried natural stones, but now many stones sold
by these names are reconstructed. The abrasive material is novaculite, a
mineral related to flint and quartz containing mainly silicon dioxide. The
relative hardness of novaculite is 6.5 on Mohs scale, just a bit harder
than file steel. The original Japanese and Greek waterstones were
also from natural sources. Natural abrasives work well on carbon
steel knives, but they struggle with harder tool steels and tougher
wear-resistant and stainless steels. For modern steels I recommend stones
made with manufactured abrasives and industrial diamonds.
Aluminum oxide, which has a relative
hardness of 9.2, is also bonded to form reconstructed stones, including
modern Japanese water stones (resin bond) and India stones (vitrified
bond). Originally this material was from natural sources (emery and
corundum), but manufactured abrasives have dominated since the early
1900s.
Ceramic stones are made from alumina
(aluminum oxide) or silicon carbide in a ceramic bond. Silicon
carbide has a hardness of 9.5 and will sharpen anything except carbide
tipped tool bits. Spyderco and others offer ceramic stones in a wide
variety of sizes and grits.
Industrial diamonds are made into
hones by bonding them to steel and are therefore also called diamond
files. Diamond has a relative hardness of 10. Two very different types of
diamonds are used in diamond hones. Monocrystalline diamond hones
last longer because the diamonds do not fracture readily.
Polycrystalline diamond is less expensive.
Diamond hones are made by DMT,
Eze-Lap and others. DMT uses monocrystalline diamonds. EdgeCraft's
unique answer to bench stones is the Chef'sChoice 400 series diamond file
system. It consists of rather thin diamond hones that fit on a
magnetic holder. It is a very good value. EdgeCraft has a good
pamphlet on sharpening which you can request from the address at the end
of this article.
An inexpensive alternative to stones
is silicon carbide sandpaper. A piece of silicon carbide (also called wet
or dry) sandpaper glued to a wooden block will work as well as a
stone. Wet or dry sandpaper on plate glass is popular with
woodworkers for sharpening plane irons and chisels, and for flattening the
sole of planes. This method is called Scary Sharp by those who
promote it.
GUIDES
You will also need a guide to control
the sharpening angle. Guides are available for knives, chisels and plane
irons. The drawback of most guides is that they waste about 3 inches of
stone, so you would need a longer stone. If you mount your stone flush
with your work surface, you can utilize the full stone length.
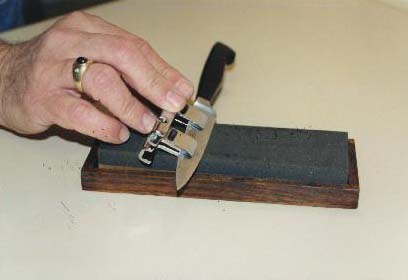
The Razor Edge Guide
The Razor Edge guide clamps on the
blade with four Allen screws and I find it inconvenient to use. Also I
managed to grind away some of this guide when I tried it on diamond
hones.
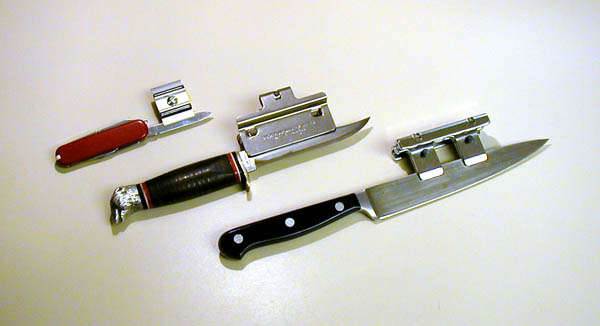
Unknown, Buck HoneMaster and Razor Edge guides.
ROD-GUIDED STONE SYSTEMS
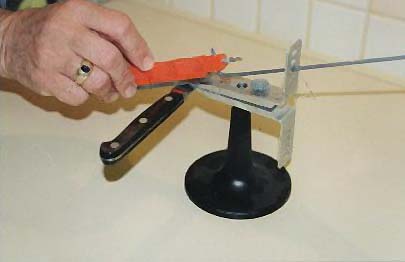

The Lansky rod-guided sharpening system has been the
industry standard for years, with good reasons.
Rod-guided
systems have a rod on each stone that slides through a hole in the guide.
This controls the angle and also prevents scratching the blade with the
stone. Since the guide slides on the rod and not on the stone, a smaller
stone is needed. Rod-guided systems sell in the $30 to $50 range,
depending on the number and type of stones. A variety of stones are
available, including ones for serrated blades. They will sharpen up to a 4
inch blade before you have to move the guide to a new position.
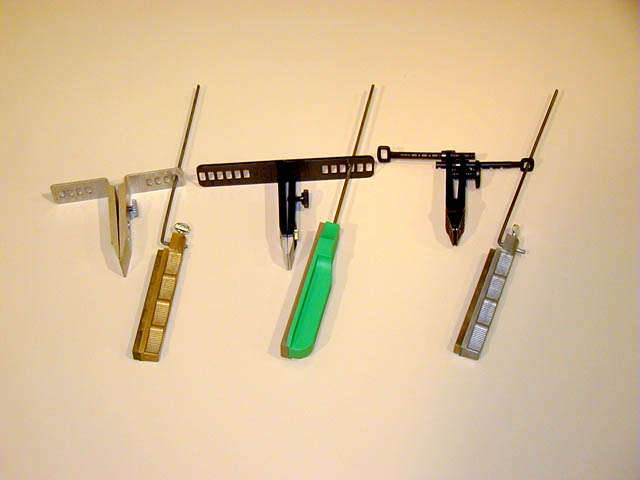 Lansky,
 GATCO and DMT rod guided systems.
Lansky,
Lansky, GATCO and DMT rod guided systems.
Rod-guided systems are available from
Lansky, GATCO, DMT and others. The Lansky has an aluminum guide that goes
from 13 to 25 degrees in 4 steps; each angle is 3 to 5 degrees lower than
indicated. The GATCO guide is aluminum and reinforced plastic and
goes from 17 to 34 degrees in 6 steps, each step is about 6 degrees
greater than indicated. I prefer the GATCO to the Lansky because of
the GATCO's larger stones and selection of angles. The DMT Aligner
guide is all plastic, and goes from 12 to 35 degrees in 7 steps, which are
not marked. With DMT diamond hones the Aligner would be the pick of
the litter for this size of system.
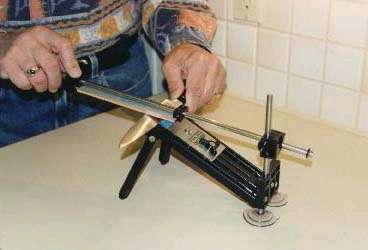
The EdgePro Apex Sharpening System
The class act in rod-guided systems
are the EdgePro Sharpening Systems. Ben Dale, the owner of EdgePro, has
spared no expense in his pursuit of excellence in hand sharpening. The
smaller Apex is rugged and uses relatively large 1 x 6 inch aluminum oxide
waterstones. The angle guide is continuously adjustable for any angle from
10 degrees to 35 degrees, with marks at 10, 15, 18, 21 and 25
degrees. My measurements confirmed that the marks were
accurate. The larger Professional model uses the same stones and angles,
but is more stable and also has a scissor sharpening attachment.
Both units come with good instruction books.
Footnotes:
(1) The Razor Edge Book of Sharpening by John Juranitch
(2) The Complete Guide to Sharpening by Leonard Lee
Company and product names are
trademarks of their respective companies.
| Home | | Contact |
| About Us |
| LINKS | |Suppliers |
| Photos |
| Sharpening
Schools |
Copyright 1996 - 2026 by Steve Bottorff